Vegetable Gardening Basics
Top tips for a successful vegetable garden
- Choose a flat, sunny location with well-drained soil. Vegetables need at a minimum of 6–8 hours of sun. Full sun is best.
- Prepare your soil well before you plant. Thoroughly remove all weeds, dig to loosen the soil, and amend with compost and fertilizer as needed.
- Choose vegetables that your family likes to eat.
- Keep vegetables well watered.
- Harvest your vegetables as soon as they are ready.
- Plan your garden so it will produce vegetables all year round. See our Vegetable Planting Chart to choose the right vegetables for each season. To grow your own transplants, see Growing Transplants from Seed. To save your own seeds, see Seed Saving Basics.
- Enjoy your garden! Observe and tend it regularly.
Sections
- Choosing your site
- Preparing the soil
- Raised beds
- Water
- Fertilization
- Tools and equipment
- What to plant and how
- Pests and disease
- Useful publications
Choosing your site
Look for full sun exposure
Be aware of shadows from buildings or trees. Notice how much of the area would be shaded and for how long each day. Keep in mind that shadow patterns change with the seasons. If your yard is too shady, consider growing vegetables in containers that you can place for maximum sun exposure.
Make sure water is available
Vegetables need a steady supply of water as they grow, so be sure there is a handy water source near the site. If needed, install a hose spigot and/or drip irrigation system before planting (see “Water,” below).
Look for good soil
Choose a flat site with good soil that is free of weeds, rocks, and debris. Avoid shallow or compacted soils. You can amend your soil to improve it (see “Modifying the soil” below). If your soil is very poor, you may want to plant in raised beds (see “Raised beds” below).
Consider access
It's easiest to take good care of a garden if it is convenient and easy to access. If possible, place it near your home and where you will see it daily.
Preparing the soil
Work with soil when moist but not wet
Much of Santa Clara County has clay soil, which is heavy but fertile and retains water well. Clay soil can be difficult to dig, but when it is at the right level of moisture, it will easily break apart into a granular structure perfect for growing vegetables. Clay soil should be worked when it is moist but not soggy. Dig after it has rained, or water your site well and wait a day or two for the soil to reach the right level of moisture.
Some sites in the county have sandy soil. This soil is easier to dig, but should not be worked when it is waterlogged or completely dry.
Dig or rototill soil
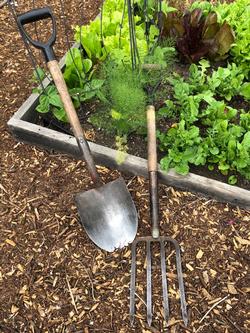
Rototilling can quickly break down the soil structure farther than is desirable, so when possible, hand-tilling is recommended.
Break up large, dry clods
After the soil has been loosened, rake the surface smooth with a garden rake and break up any large clods that remain. If you are preparing a bed for the first time, you may need to rake and break up clods several times to achieve the uniform soil structure you want for your vegetables. If the clods are hard and dry, wet them and then start working them down.
Improving the soil
The ideal soil is a loam, one whose texture is not too light (sand) or too heavy (clay). No soil is perfect, but try to use the best soil that you can find. Very light or very heavy soils can be modified with organic amendments to increase their water-holding capacity or to improve drainage.Modifying clay soil
To make clay soil into excellent garden soil, work in organic matter regularly. Adding organic matter helps separate the clay particles, making heavy soils more friable (crumbly), and improving water and root penetration.
Modifying sandy soil
Light, sandy soils are generally very low in organic matter and water-holding capacity. Adding large amounts of organic matter to light soil increases its water-holding capacity and the percentage of organic content.
Amounts and type of organic matter needed
To be effective, large amounts of organic matter such as humus, compost, or well-rotted manure are necessary. About one-third by volume of soil is often desirable, and less than 20 percent is often ineffective. Many different plant materials and manures can be used for this purpose. Compost is a convenient choice for homeowners: compost sources in Santa Clara County.
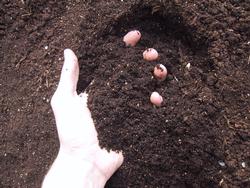
When you are digging a vegetable bed for the first time, spread 2 to 4 inches of compost over the prepared garden area and mix it into the top 1 foot of soil. Sifting it in with a garden fork is one method. Compost breaks down in the soil over time. Plan on adding about 1 inch of compost to your beds each year when you prepare them for planting.
Some materials sold as soil amendments have a higher carbon to nitrogen ratio than compost. Examples are peat moss, straw, or shredded bark. If you use one of these materials, you must add extra nitrogen fertilizer to the soil along with the amendment to aid in the decomposition of the material. Some other amendments (green plant material, fresh manures) have a relatively lower carbon to nitrogen ratio. If one of these is used, you must allow about 3 to 4 weeks for the material to decompose in the soil before you can plant.
If you have concerns about the quality of your soil, you can have a soil test done.
Raised beds
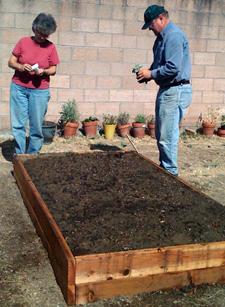
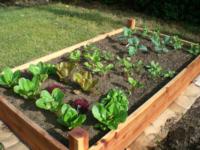
Benefits of raised beds
- Easier to garden in
- Better drainage
- Lets soil warm sooner in the spring
- Keeps soil from being compacted by being walked on
- Saves water by keeping it on the plants and off the paths
Materials for raised beds
Raised beds can be built from any material that can surround a bed of soil and raises it above ground level. For example, chunks of broken concrete (“urbanite”), pavers, bricks, or logs make good edging for raised beds. Metal stock tanks or other large containers can also be used if drainage holes are added to the bottom, or the bottom is cut out entirely.
Raised beds are often made of wood. Redwood and cedar are naturally rot-resistant and last many years. Composite decking is another good option. Avoid using wood with old paint on it, which might introduce lead to the soil. See Selecting Lumber and Lumber Substitutes for Outdoor Exposures for more information.
When made of wood, the sides of the bed offer a good place to fasten markers or stakes for trellises. If gophers are a problem, a screen of ½” wire hardware cloth can easily be nailed or stapled to the bottom of a wooden bed before it is filled with soil. This video shows how to build a very simple wooden raised bed.
Dimensions for raised beds
Raised beds can be built to any shape, length and width you like. However, keep in mind the length of your arms. It can be difficult to care for plants in the center if the bed is more than three feet wide. Beds should probably be no more than 3–4 feet wide for ease in planting and care, and can be as narrow as 12 inches if space is limited.
Soil for raised beds
A raised bed may be filled with any good potting mix or modified soil. One-third to one-half of the mix can be your native soil, and the remainder may be compost or other organic material. If good quality loam topsoil is available, less organic matter is needed. If you choose to purchase soil, ask your nursery or landscape material center for a soil mix specifically for growing vegetables in raised beds.
Optional extras for raised beds
- Add a mulch of wood chips or gravel around the bed to keep weeds and grass away from the bed. Also nicer to walk on in wet weather.
- Install a permanent drip system or a faucet for irrigation hoses.
- Attach trellises for growing tall vegetables in or over the bed.
- Use short pieces of pipe on the outside of the bed to hold hoops for supporting insect barriers or frost covers.
This video about raised beds shows many of these extra ideas.
Water
For best growth, the soil should stay evenly moist. Try to avoid alternating wet and dry, since that can sometimes cause growth problems.
How often to water
Your watering schedule will vary according to the season, your soil type, weather conditions, and the plants you are growing. You will need to water more frequently when seedlings are young or when it is hot.
Check the soil moisture often. Dig a small hole, look at the soil, and feel it with your fingers. When plants are small, dig 1–3" deep; for larger plants with deeper roots, such as mature tomatoes, dig 6–8". The soil at the bottom of the hole should be moist. If it is dry, you need to water.
Newly planted seeds and seedlings
If you have planted seeds directly in your garden beds, you must keep the soil moist until the seeds have germinated and the plants are safely up. Germinating seeds are particularly vulnerable to drying out. Use very gentle sprays of water once or more per day until the newly sprouted plants are well started. Be sure that seedlings don't dry out for the first couple of weeks, until they start sending roots out into the surrounding soil.
Irrigation
An efficient and convenient way to irrigate vegetables is to use drip tubing, drip tape, or soaker hoses. These devices supply water directly to the soil so it is absorbed into the root zone with minimal evaporation. Installation of a drip system may seem complicated, but it is worthwhile and will save time and water in the long run. This drip irrigation video illustrates one way to set up basic drip irrigation controls.
Checking soil moisture as described above will help you choose an irrigation schedule that is right for your garden. Many gardeners find that drip systems must be run for about 20-40 minutes 2-3 times per week during summer months; but sun exposure, daily temperatures, wind, soil type, and plant size will all affect watering time. Change your watering as plants grow or as the weather gets hotter or colder.
Mulch
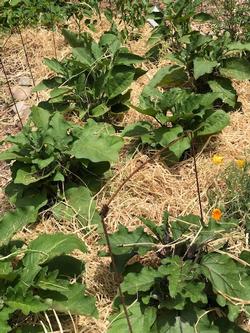
Using a layer of mulch around plants has many benefits. Mulch is a material, such as straw or unsifted compost, that is applied on top of the soil, not worked into it. It helps to conserve soil moisture, discourage the growth of weeds, and protect the soil surface from intense sun or driving rain. The coarser the material used, the thicker the layer as to be in order to be effective. Mulch should be placed on top of drip tubing or soaker hose. If you are overhead watering with a hose or sprinkler, enough water has to be applied to get through the mulch layer and enter the soil around your plants.
Fertilization
Plants need 17 different elements in varying amounts to grow successfully. Nitrogen is the nutrient that they need in the largest amount. Nitrogen is naturally low in almost all Santa Clara County soils and washes out easily by dissolving in water. Fortunately, our county soils generally have adequate amounts of all the other essential plant nutrients, so nitrogen is usually the only one we need to add regularly.
Choosing a fertilizer
Garden centers offer a wide variety of both synthetic and plant/animal-based fertilizers formulated to provide nitrogen and other nutrients. On the label, nitrogen is the first number listed. For instance, a package labeled 10-10-10 and one labeled 10-0-0 will both contain the same amount of nitrogen. Follow the instructions on the package to determine how much to use. If you are unsure, or your fertilizer package does not specify amounts to use, the Master Gardener Help Desk can assist you.
Manure can also be used as a fertilizer. Use well-rotted/composted manure that is free of weed seeds, and work it into the garden bed several weeks before planting. Nitrogen content of manures varies, but commercial products will have instructions for use on the package.
Whichever type of fertilizer you choose, it is important to add the correct amount to your garden beds each time you plant. Scatter the fertilizer over your prepared bed and mix it into the soil before you plant.
Note that while compost is an excellent soil amendment for both clay and sandy soils (see Preparing the Soil above), it does not contain enough readily available nitrogen to serve as a fertilizer for rapidly growing annual vegetables.
Side-dressing
Many vegetables that grow and/or produce over a long season will respond well to getting a second dose of fertilizer about 5-6 weeks after planting. This technique is called “side-dressing.” Scatter fertilizer on the ground near the plants (not right at the stems), scratch it into the soil with a hand cultivator or hoe, and water thoroughly. For side-dressing, it is best to use a fertilizer that will dissolve easily when watered in (examples are synthetic fertilizers and some guanos) or that is mixed in water before application (an example is fish emulsion).
Tools and Equipment
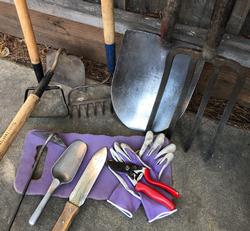
The following tools are useful in the vegetable garden:- hand trowel or hori-hori knife for transplanting
- hoe for digging up weeds or making furrows
- garden rake (not leaf rake) for smoothing out soil and preparing beds
- spade or spading fork for turning soil
- yardstick, twine, and stakes for spacing rows evenly and in straight lines
- garden gloves and kneeling pad
- pruner for harvesting some vegetables
Clean your tools after using them (a putty knife or wire brush is useful for scraping off dirt) and put a thin coating of oil on them to protect them from rust or corrosion. Keep tools in a dry place; keep cutting tools sharp. Tool care tips
What to plant and how
Choosing what to plant
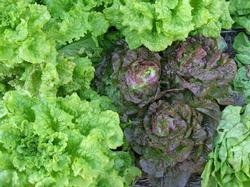
- Choose the right vegetables for the season. Some vegetables require warm weather while others do best in our cool season. Our main Vegetable Page lists vegetables by Warm Season and Cool Season.
- Plant vegetables you and your family like to eat. Try not to plant more than you will want or can take care of.
- If you have limited space, you might want to choose plants that you can harvest over a long period of time such as tomatoes, beans, and summer squash in the summer or lettuce, chard, and peas in the winter.
Making a plan
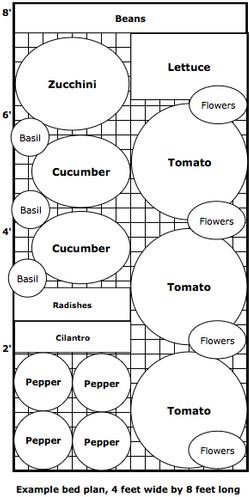
- Draw a map of your garden to decide what to plant where. Pay attention to how much space each plant needs.
- Place tall plants or trellises on the north side so that they don’t shade the rest of your plants.
Planting seeds
- Plant seeds when the soil temperature is warm enough. Refer to our Vegetable Planting Chart for the best times to direct seed-specific vegetables.
- The seed packet should tell you how far apart to plant them.
- Some plants grow quickly and have a short harvest time before they bolt (send up a flower stalk), such as radishes and cilantro. You may want to ‘succession plant’ them which means planting a small batch, then planting another batch 2–4 weeks later, so you can have a steady harvest.
- If you store leftover seeds in a cool, dry place, they are generally good for a few years.
- Here's a video about starting seeds indoors.
Transplanting seedlings
- Refer to our Vegetable Planting Chart for the best times to transplant specific vegetables. If you grow your own transplants from seed, start them 4 to 6 weeks before the desired planting date.
- Try to transplant seedlings on a cool, overcast day so they aren’t stressed by heat and sun. Or shade them for a few days until they recover.
- When ready to plant, be sure that the soil in your bed is thoroughly moist and that seedlings are well watered.
- Handle the seedling gently. Don’t use the stem like a handle to pull on it.
- Plant the seedling so the soil level is the same as it was in the pot. Tomatoes are an exception and can be planted deeply.
- Water them in gently to settle the soil around them. This is important to do even if the soil is moist because it helps the soil ‘hug’ the new transplant.
Pests and diseases
You can avoid or minimize the damage from many pests and diseases simply by giving your plants good growing conditions so that they are strong and vigorous. That means full sun, well-prepared soil, the right amount of water and fertilizer, enough space, and planting at the correct time. Even so, most gardeners have problems they need to deal with.
General principles for managing all kinds of pests
- Pay attention to your plants so you notice pests early, before too much damage is done.
- Identify the pest and learn how to manage it. Check our page on a specific vegetable for typical pests.
- Use the least damaging, least toxic methods first.
- This process is called Integrated Pest Management, or IPM.
Be tolerant
Accept that a certain amount of disease or pest damage can be tolerated in our home gardens. Home-grown vegetables don't need to look grocery-store perfect in order to be healthy and delicious.
Weeds
In your garden, weeds will compete with your vegetable plants for water, nutrients, sunlight, and space. If allowed to grow, weeds will prevent your vegetables from developing properly, reaching maturity, and producing food for you to eat. It is important to observe your garden and notice weeds when they begin to grow. The easiest way to control weeds is to pull them out by hand when they are small. Alternatively, cut them off at the base with a hoe or garden knife. Keeping a layer of mulch over the soil around your plants will significantly reduce weed problems and make them easier to pull if they do sprout.
Useful publications
- California Master Gardener Handbook
- Pests of the Garden and Small Farm
- Vegetable Pest Identification for Gardens and Small Farms
(spiral bound quick ID cards) - Natural Enemies Handbook
- Abiotic Disorders of Landscape Plants
This page was adapted from UC ANR Publication 8059 by Pamela M. Geisel and Carolyn L. Unruh


