Seed Saving Basics
Saving seeds is an easy and economical way to continue growing favorite varieties.
Top tips for successful seed saving
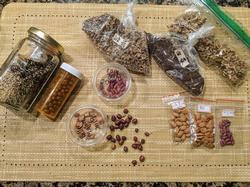
- Save seeds from healthy plants and healthy produce. Seeds from sickly plants may produce weak seedlings, might pass on genetic weakness, or even harbor disease. For best results, save seeds from your best plants.
- Grow open-pollinated varieties for seed saving. Seeds from hybrid varieties may not “breed true”, i.e. might produce plants very different from the parent.
- Know which plants self-pollinate and which cross-pollinate. Seeds from plants that can be easily cross-pollinated by insects or wind may give unexpected results.
- Let seeds mature on the plant before collecting. For vegetables, this sometimes means leaving them on the plant longer than you would for best eating quality.
- Clean and dry seeds, then store in low humidity at 45°F or less. Storage in a refrigerator is ideal, but if not possible, store in the coolest, driest location in your house.
- Label and date seed packets. Useful information to include: plant type, variety, any special growing conditions such as steps taken to prevent cross-pollination.
Selecting seeds to save
Easy seeds to save
For seeds to breed true, successful seed saving requires a little knowledge of how plants are pollinated. Seeds from hybrid (F1) plants may yield unexpected results. The easiest seeds for reliable results are self-pollinating plants.
Some examples of easy seeds to save are below. Click on the links for more detailed information.
Vegetables:
- Calendula
- Cleome
- Columbine
- Foxglove
- Globe amaranth
- Marigolds
- Morning glories
- Nasturtiums
- Nigella
- Poppies
- Snapdragons
- Sunflowers
- Zinnias
More difficult seeds to save
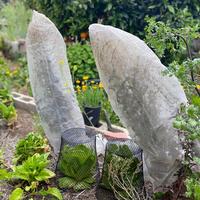
Saving seeds from plants that can easily cross-pollinate is a little trickier. To produce seed that will give you the same characteristics as your original plant, it is necessary to isolate them from plants of the same species, either by distance or physical barrier. For backyard gardeners, isolation by distance is often impossible, given the distances insects can fly and especially if your neighbors have gardens as well. A physical barrier such as a fine mesh cage or mesh bags on flowers may be needed. If your garden is distant from others, you can try planting varieties at different times, since the varieties should not cross-pollinate as long as they are not flowering at the same time. See the books listed in the references section for these advanced seed-saving techniques.
- Broccoli (see section on biennials)
- Chives
- Cilantro (coriander)
- Corn
- Cucumber
- Garlic
- Kale (see section on biennials)
- Okra
- Onion
- Pumpkin
- Spinach
- Summer squash
- Winter squash
Select seeds to collect
Collect seeds from the healthiest fruits on the healthiest plants that have the characteristics you want. For example, you might choose the flowers that last the longest, tomatoes that taste the best, or beans that are the most productive.
Collect when the pods or fruits containing the seeds are fully mature. For flowers, this means letting the seed heads dry on the plant rather than deadheading. For some vegetables, such as cucumbers or eggplant, this may mean leaving them far past the usual stage for eating.
Note that for some vegetables, allowing the fruits to mature on the plant can slow down the plant's production. You may want to wait to save seeds towards the end of the season or grow some plants just for seed saving.
Separate seeds from the plant
There is a dry method and a wet method to separate and clean the seeds.
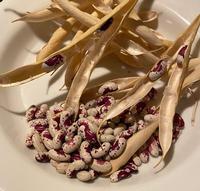
Dry method: This method is suitable for plants that produce dry pods, such as beans, peas, lettuce, chives, most of the broccoli family, and most flowers.
Threshing: Gather the seed pods and thresh the seeds to break them out of their hulls. Some methods for threshing:
- Pick out the seeds, if they are large and easy to separate.
- Rub the pods between your hands to separate the seeds from the hulls.
- Put the seed pods in a sack and beat them or walk on them to break them out of their hulls.
Winnowing: Separating the seeds from the chaff (debris) is called winnowing. How you winnow will depend on how heavy or light the seeds are. Some methods for winnowing: carefully toss the seeds in the air in the presence of a light breeze, a fan, a hair dryer on “cool” setting, or even just your own breath. The goal is to blow the lighter plant debris away from the heavier seeds.
Wet method: This method is suitable for fleshy, wet fruit plants such as tomatoes, squash, and cucumbers. In general, the steps are:
- Cut open, then scoop or scrape seeds out into a container.
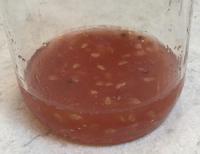
- For some wet fruit seeds, especially tomatoes, seeds are fermented before drying. Fermentation removes the gelatinous tissue which has chemicals that prevent the seeds from germinating when they aren't supposed to. Follow the links for detailed procedures for wet fruit plants such as tomatoes, squash, and cucumbers.
- If not fermenting, wash seeds in water to remove pulp.
- Dry seeds thoroughly inside the house, on a glass, ceramic, or metal surface. Drying seeds on paper towels or cloth is not recommended, as they can stick and be very difficult to remove. Coffee filters can be used because seeds do not stick to them. Large seeds, such as squash, can be dried on newspaper.
Store seeds
Be sure seeds are thoroughly dry before storing. There are a few tests to determine dryness in seeds:
- For thin seeds such as melon seeds, test by bending a seed. If it snaps, the seeds are dry enough for long-term storage. But if it bends, they need more drying.
- For larger seeds, such as beans, test by hitting one with a hammer. If it shatters, the seeds are ready for storage. But if it mashes, they need to continuing drying.
- Another easy test is to bite a seed. If a tooth mark is visible, they need more time to dry.
Store seeds in a tightly sealed container. Glass jars work well. In order to kill any insect pests or eggs, put the seeds into the freezer for a few days. This is especially important for legumes such as beans and peas, as well as corn. Let the container come to room temperature before opening, to prevent condensation.
The ideal temperature for long term storage is 45°F or less. A refrigerator is a good location, but if that is not possible, keep the sealed seed containers in the coolest and driest location in your house.
As a general guideline, the sum of temperature (°F) and percent relative humidity (RH) should be less than 100. Therefore, storing seeds at 60°F and 30% RH would be ideal conditions. 50°F and 60% RH would lead to reduced seed longevity.
It is recommended to add a desiccant to the container to absorb moisture, such as a silica gel packet or powdered milk in a porous bag or envelope.
Label and date the containers. In addition to the plant type and variety name, you may want to include notes about the seed source, when the seeds were harvested, how many plants were harvested, and any special steps taken to prohibit cross-pollination, especially with seeds from the brassica or cucurbit families.
How Long Will My Seeds Last?
Over time, seeds lose the ability to grow. “Seed germination rate” refers to the ability of the seed to sprout. “Seed viability” refers to the strength and vigor of the seedling, after germination.
Many seeds can last several years under ideal storage conditions. If they are stored at higher than ideal humidity or temperature, germination rate and viability will decline faster.
Here are some general guidelines for seed lifetime when stored under ideal conditions:
1–2 years: Aster, coneflower, fennel, onion, parsnip, sage, sweet corn
1–3 years: Bean, carrot, daisy, pea, poppy, okra, pepper
4–5 years: Basil, broccoli, cabbage, cauliflower, cosmos, cucumber, eggplant, lettuce, nasturtium, oregano, pumpkin, radish, snapdragon, squash, sunflower, tomato, watermelon, zinnia
Checking Seed Germination
If there is a question regarding the condition of your stored seeds, you can perform a simple germination test:
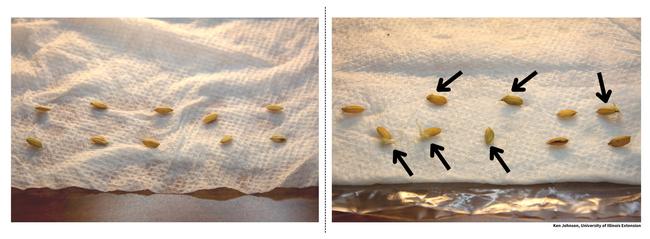
- Moisten a paper towel and lay it flat.
- Place 10 seeds on the paper towel and fold it over the seeds.
- Place the paper towel in a plastic bag or container and seal it. Label the container with the plant type and date.
- Place the bag in a warm area, such as on top of a refrigerator. Temperatures around 70°F are good. Sunlight is not necessary.
- Check on the seeds every few days. Make sure the paper towel remains moist. Many plant types will germinate within 7 to 10 days.
If all seeds germinate, plant normally. If 70% to 90% germinate, you can still use the seeds, but may want to sow heavier than normal. If fewer than 50% to 60% germinate, it is probably best to use new seeds.
Seed viability often declines faster than germination rate, so remember that it is possible for old seeds to germinate, but produce weak seedlings.
References
“Are my Seeds Still Good? Testing Seed Germination”, University of Illinois Extension
“Will My Seeds Still Grow? Seed Viability and Germination”, University of Illinois Urbana-Champaign Extension
“Saving Tomato Seeds”, UC Master Gardeners of Santa Clara County
“Saving Pepper Seeds”, Agricultural Sustainability Institute, University of California, Davis
“Seed Saving Basics”, The Pennsylvania State University Extension
“Which Plants are Easiest to Save Seeds From?”, Iowa State University Extension and Outreach
“Seed Saving”, Washington State University Spokane County Extension
“How to Save Seeds”, Seed Saver Exchange
“Seed: Collecting and Storing”, The Royal Horticultural Society
“The Seed Garden”, edited by Lee Buttala and Shanyn Siegel, Seed Savers Exchange, 2015
“Seed to Seed: Seed Saving and Growing Techniques for Vegetable Gardeners, 2nd Edition”, Suzanne Ashworth, Chelsea Green Publishing Co., 2002
“The New Seed-Starters Handbook”, Nancy Bubel, Rodale Press, 1988


