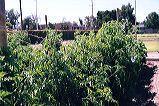
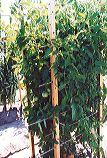
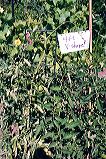
This is a summary of what we learned from our 2001 tomato project in regards to tomato staking methods. We grew just over a hundred varieties of mostly heirloom tomatoes at the now closed University of California Bay Area Research and Extension Center facility in the City of Santa Clara.
Wire Mesh Cages
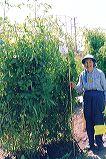
This method is composed of a series of reinforced cement wire mesh cylinders of graduated diameters. Cylinders vary by 6-inches in circumference to enable three or more cages to be nested one inside another for efficient storage purposes. Sizes range from 5’ – 7’ tall with mesh openings of 6-inch square. Cages are held together by bending over cut ends or tying with wire. Each cage can be anchored at its base by either a 4’ length of 1”x2” wooden stake, metal rod, t-stake, rebar including by cutting the cage’s horizontal wires and pushing remaining vertical wires into ground.
Advantages:
- Can be stacked inside one another for improved storage space efficiency
- All materials can be used for multiple seasons
- Easy to work with once made
|
Disadvantages:
- Hard to see/collect fruit inside cage due to foliage if plant is not pruned
- With taller 7-foot cage sizes, it is difficult to reach top fruit without a ladder
- Mesh material rusts which doesn’t really matter
- May require two or more people to handle the mesh during initial construction
|
| Tools needed:
|
Materials:
- Cement mesh (height as desired)
|
Cement Reinforcing Mesh Trellis with EMT Electrical Conduit
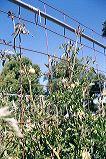
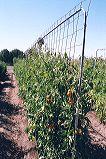
The materials for this method feature a very strong wire mesh used to reinforce cement. Cut lengths of “EMT” electrical conduit to support this. In order to demonstrate the ability to build trellis structures appropriate to several heights of vine growths, a stairstep arrangement of three 10-foot wide 5-foot, 6-foot, and 7-foot tall sections was constructed prior to planting. These sections were butted end-to-end in a straight line down the middle of a 30-foot row of seedlings.
Each section consisted of the following: a single horizontal 10-foot conduit piece supported by two vertical pieces long enough to be driven 18” to 24” into the ground while still maintaining the requisite 5, 6, or 7-foot above-ground height. The horizontal bar of each section was attached to the two vertical supports with two 18-inch lengths of conduit, bent at right angles using a conduit bender, and inserted into openings of the ends of the three conduit pieces to be joined.
Lastly, a single piece of the concrete reinforcing mesh was cut so as to fit the 30-foot long, stairstepped conduit framework but extending 6” above each of the 5, 6, and 7-foot tall sections. The mesh piece was modified at the shortest 5-foot end by removing a 1-foot by 10-foot section at ground level to facilitate access to the bottoms of the vines. It was attached to pieces to be joined. It was attached to the framework using heavy metal wire clips on the crossbars and a lighter wire on the vertical supports. Flatten bottom of vertical posts prior to installation.
Advantages:
- Cutaway bottom section afforded easier access to work at ground level
- Easy to dismantle and store, either by hanging on fence or wall or rolling
- Easy access to fruit
- Visually appealing
- Tomato vine snakes through mesh easily
- Conduit and mesh sections can be used for multiple seasons
- Uses less wire than cages when plants are closer than six-feet apart in rows with minimum spacing between rows
- Easy to weed around
|
Disadvantages:
- May require two or more people to handle the mesh
- The cut mesh edges are sharp
- Mesh will rust
|
Tools needed:
- Wire cutters
- Saw to cut conduit
- Sledge hammer or other tool to pound conduit into ground
- Conduit bender
|
Materials:
- Conduit
- Mesh 5ft, 6ft, or 7ft height
|
Recommendation:
- Install trellis structure prior to planting
Electrical Conduit and Vertical String Method
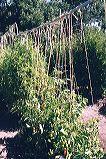
Similar set up to Cement Reinforcing Mesh with EMT Electrical Conduit Method; however substituting twine for wire mesh. Cut lengths of natural fiber twine (heavy gauge) and tie a Bowline knot at bottom of main young tomato stems when plants begin to sprawl. Twirl the twine around the stems to top of plants in approximately 3 cycles. Tie the excess twine to the horizontal conduit using a clove hitch with a slipknot so it can easily be untied in order to gather more of the plant stems as they grow.
Advantages:
- Minimum storage capacity required
Fruit easily accessible
Workers can access the entire plant
Framework can be installed before planting
Easy to weed
Conduit sections can be easily stored and reused for multiple seasons
|
Disadvantages:
- Need to continuously monitor and tie existing and new main plant stem growth
- Tools needed
|
Tools needed:
- Wire cutters
- Saw to cut conduit
- Sledge hammer or other tool to pound conduit into ground
- Conduit bender
- Twine cutters
|
Materials:
|
Recommendations:
- Install trellis structure prior to planting
Post and Twine Method
This method features 8-foot long, 2-inch diameter post driven into the ground at 10-foot intervals and connected by several horizontally strung rows of natural fiber twine (heavy gauge). A key feature of this method is to “sandwich” the tomato plant between a double-wrap of the twine around each pair of posts. That is, begin and end the first run of the twine on the same side of each post and each plant to be supported. Then string the twine on the opposite side after rounding the second post. The first row of twine is strung about 12-inches above the ground and then continued no more than 10-inch increments as the plant grows.
Advantages:
- Wooden posts can be used for multiple seasons
Easy and space-saving storage
Less expensive
|
Disadvantages:
- Requires continuous twining throughout the season to capture growth
- Twine stretches with the weight of the tomato plant, causing sagging
- Tends to allow tomato plant to sprawl
- Needs constant monitoring and working
- Hard to locate tomatoes due to thick/compact of vegetation
- Prone to breakage due to twine breakage/stress on wooden posts
- May be difficult to remove wooden posts from ground without damage
- Requires much pruning of plant to optimize this method
|
Tools needed:
- Scissors
- Sledge hammer or other tool to pound posts into ground
|
Materials:
|
Recommendations:
- Place posts at 4-6 foot intervals with no more than two plants between posts. This will reduce the stress on the twine from heavy stem and foliage growth.
- Use heavy nylon twine instead of natural jute
Commercial Round Generic Tomato Cage
Lightweight metal, 3 feet tall round cages, with protruding legs that are pushed into the ground.
| Advantages:
|
Disadvantages:
- Difficult to reuse from one season to the next due to bending and/or breaking of wire
- Requires cages to be reinforced so tomato plants don’t cause them to fall over.
- Plants typically exceed cage height, which either requires extensive pruning or if left unpruned causes stems without support to bend and break.
- Not strong enough for robust plants
|
Tools needed:
- Difficult to reuse from one season to the next due to bending and/or breaking of wire
- Requires cages to be reinforced so tomato plants don’t cause them to fall over.
- Plants typically exceed cage height, which either requires extensive pruning or if left unpruned causes stems without support to bend and break.
- Not strong enough for robust plants
|
Materials:
|
Recommendations:
- Use for “determinate” varieties of tomatoes and/or pepper plants or eggplants
Texas Giant Tomato Cages
Round galvanized commercial cages which measure 5 feet in height with a 2-foot diameter and mesh openings which measure 8” x 16”.
Advantages:
- Come in two sections that fold flat for easy efficient storage
- Strong enough that no staking is required
- Openings large enough to pick fruit and work plant
- Does not rust
- Can be used for multiple seasons
- Attractive
|
Disadvantages:
- Expensive
- 5-foot height limitation
- Not widely available
|
| Tools needed:
|
Materials:
|
Square Commercial Tomato Cages
Similar to Round Commercial Tomato Cages but store flat.
Advantages:
- More suitable for determinate varieties, pepper plants or eggplants
|
Disadvantages:
- Difficult to reuse from one season to the next due to bending of ground stakes
- Requires cages to be reinforced
- Plants typically exceed cage height, which causes stems without support to bend and break
- Cage can tip and cause plant breakage
- Not strong enough for robust plants
|
| Tools needed:
|
Materials:
|
Metal Spiral Rod
Uses a 5-foot tall galvanized metal spiral rod which stems are wound around and up. Plants must be pruned to single stems for optimum effectiveness.
Advantages:
- More suitable for tomato plants pruned to one main stem
Can be reused over multiple seasons
|
Disadvantages:
- Far too light weight of a support for indeterminate tomatoes
You have to prune off 90% of the plant for it to properly support what is left
Requires reinforcing stake when used for larger plants
Not strong enough for robust sprawling plants
Not readily available
|
| Tools needed:
|
Materials:
- Spiral plant support
- Ties (optional)
|
Square Wooden Cage
This method features four wooden 2”x 2”, 8-foot tall stakes arranged at 4 corners of a square pattern. Twenty-eight mutually orthogonal holes are drilled at 6-inch intervals beginning at 12” from the ground. Thin rods (such as bamboo or dowels) are inserted into the holes between adjacent posts such that alternating parallel sides of the “square” have two parallel rods every 6 inches along their height. For robust plants, space posts at least 2 1/2-feet apart.
Advantages:
- Excellent way to handle large plants gracefully
- Creates eye pleasing garden structure
- Minimum pruning required
- Rods can be easily removed and reinserted to capture sprawling plant
- Storage areas minimum for stakes and rods
|
Disadvantages:
- Initial setup is labor intensive and expensive
- May be difficult to see/ pick fruit inside “square”
|
Tools needed:
- Sledge hammer or other tool (recommend pole pounder) to pound stakes into ground
- Drill
|
Cost:
- Stakes: $0.30/foot
- Rods: 0.50 each
|
Recommendations:
- Install trellis structure prior to planting
Traditional One Stake Method
This method features a stake 6-8 foot tall, which is used to tie tomato stems to. Requires pruning out all but about three main stems.
Advantages:
- Fruit easily accessible
- Can plant many varieties in small area as spacing can be as close as 18”
- Access to entire plant
- Easy to weed
- Minimum materials needed
- Stakes reusable and easy to store
|
Disadvantages:
- Constant pruning is required
- Plant can exceed stake height causing stems to bend and break
- Reduces production
|
Tools needed:
- Sledge hammer or other tool (recommend pole pounder) to pound stakes into ground
- Ties such as green or clear nursery tape
|
Materials:
|
Recommendations:
- Install trellis structure prior to planting
- Keep tomato plant pruned to 1 – 3 stems
V-Shaped Stand
This 4-foot above ground stand is a heavy gauge wire, prefabricated commercial tomato stand that is in a shape of an open V. Plants grow up into this open V-shape space. Mesh openings in stand allow the tomato vines to snake through.
Advantages:
- More suitable for semi-determinate tomato varieties
- Can be used for multiple seasons
|
Disadvantages:
- Four foot height is too short for indeterminate tomatoes
- Do not recommend this for staking tomatoes as it doesn’t work
- V-Shape space is too small for robust and sprawling plants
- Doesn’t contain stems, but they tend to fall out on open part of V.
- Requires constant pruning to keep vines within V-shape opening
- May require additional staking for heavy stem/foliage varieties
- Expensive
|
| Tools needed:
|
Materials:
- V-shape stand (current sources unknown)
|
Recommendations:
- Install trellis structure prior to planting
- Use for varieties that are heavily pruned
Originally written by Sue Evanicky with Nancy Garrison
